Thursday, November 18, 2010

Macaroni and Cheese the Right Way


Macaroni and cheese. My favorite food. I could eat this stuff every day for the rest of my life. I would die weighing about 3 tons, but yum-o.
Now, there are a lot of different ways of making mac'n'cheese out there today, and I have tried quite a few of them, but I always come back to my mom's recipe. It's not baked, so there are no nasty, crunchy pieces of pasta, and the ingredients aren't all just dumped together, which always produces extra-greasy, gloppy, separated mac. Also, it does not come out of a blue box, which is the best part. My hubby grew up on that blue box crap, and I am proud to say that I am the one who introduced him to the good stuff. He's very glad i did.
And I'm sorry, but like most of my family's recipes, there aren't really any measurements or decipherable instructions, but I shall try my best to translate. I will warn you that this stuff can get addicting, because it's easy, and it's like..um...heavenly.

Judy's mac'n'cheese. (It's a long story why we call it Judy's, ask me sometime you want a laugh)

8 oz elbow macaroni
2 Tbsp. butter
2 Tbsp. flour
about 1 1/2 - 2 cups milk
Shredded cheddar cheese (about 2 cups)
A dash of ground mustard
Salt and pepper

Boil your macaroni to al dente. While that cooking, make a roux. I.E. melt the butter in a medium saucepan. Once fully melted, add the flour and mix well, and cook that mixture for 1 minute. Gradually add the milk and cook and stir that over medium low heat until it gets all nice and thick. Add the mustard, salt and pepper. Then turn off the heat, add the cheese and stir until it's all the way melted.
Drain your macaroni well, and then combine the cheese sauce and the pasta. Eat it straight from the pot. Just do it.
There are lots of variations you can do to this recipe as well. You can use half and half cream instead of milk, or a combination of those (which is great is you need to use up leftover half and half). You can also use different kind of cheeses. Today I used Cracker Barrel sharp cheddar and it was A-MAZING. Any kind of cheese you'd like, really. Just so long as it melts nicely, that is. Enjoy!

I apologize for the terrible picture, hubby was quite ill today, and I was therefore not really applying myself to spending time taking a really good picture.

Tuesday, November 16, 2010

Sauteed Veggies with Rice


I had quite the busy day today, what with running errands all over town and then randomly deciding to reorganize my entire pantry, which was a lot of fun, but took a while.
So when it came time for dinner, I wanted to make something fast and easy. I had seen a recipe for vegetable saute on foodnetwork.com from Alton Brown's Good Eats. I didn't have everything his recipe called for, so I created my own version of it. It was very, very good and really simple. This ensemble of rice and veggies is great because you can fix the veggies in the same time it takes for your rice to cook. What's that quote from the A-team? "I love it when a plan comes together." Amen.

My version of Alton Brown's Vegetable Saute

4 tsp. sesame oil
1 tsp minced garlic
1 Tbs. minced fresh ginger
1 carrot, cut in 1/4 inch rounds
1/2 tsp kosher salt
Pinch pepper
About 4-5 ounces trimmed fresh green beans
1/4 head green cabbage, thinly shredded
1/2 med. zucchini, shredded
1 tsp. rice vinegar
1 tsp. white wine vinegar
pinch of dried mint leaves

Place green beans in a microwave safe bowl, add about 3 Tbsp. water, cover and microwave for about 3 minutes.
Heat oil in a 10 inch skillet over medium heat. Once oil starts to shimmer, add the garlic, ginger, carrots, and salt and pepper. Saute for 4 minutes.
Add the cabbage and saute for 1 minute.
Add the green beans, saute 1 minute.
Add the zucchini and stir.
Remove from the heat and stir in the vinegars.
Serve with hot rice and garnish with a sprinkle of mint.

Friday, November 12, 2010

Cardamom Bread Braid


Today was a rainy, gray day. The kind where you want to stay in bed all day...well if you're a normal person, that is. Days like today make me want to bake stuff. It makes me feel all fall-y and it helps warm up the house. It's 'comfy', if you will.

This bread is one of my favorite recipes, handed down to me from my mother. I've no idea where she got it from, but I'm glad she did! I'm also glad that she gave me half of her cardamom supply, because it is ridiculously expensive; like $13+ for a little tiny container of it. And if you're a skin-flint like me, you'll have a hard time paying that much for so little.

This bread does take quite a while to make, but it is so worth it if you love fresh bread. And a tip, be sure your place of living is warm (so skin-flints of winter: you'll actually have to turn on your heat), otherwise your bread dough won't rise, and that's bad.

The steps are pretty similar to most yeast breads, mix the ingredients, knead it for a bit, let rise. Shape, let rise. Bake.
One of the differences in this recipe as opposed to most is that it uses warm milk instead of water for the yeast mixture. I also think the most interesting ingredient in this bread is the shredded wheat. I just buy the Post Shredded Wheat original. They are shaped in large squares, and crumbling one is enough for one batch of this bread.

Just before baking, you'll also brush the top of your braid with milk and sprinkle a healthy amount of sugar on it. The taste and texture this step adds always reminds me of the sugar covered pretzels the Germans eat in celebration of St. Martin's day. So don't forget this step, because it really adds a delicious little touch of sweetness.

Also, the best part of making this bread is braiding the dough. I always loved to watch my mom braid it when I was little, thinking it was so awesome that she was braiding food in the same why she used to braid my hair. Yes, I was an easily entertained child....
So if you have kids, letting them help braid the dough would be a great way to involve them in the workings of the kitchen, which is something I believe every child should get to experience.

So...what are you waiting for? Get baking, people!

Cardamom Braid
1/2 cup whole wheat cereal biscuits (I use Post Shredded Wheat Original)
3 cups all-purpose flour, plus more if needed
1 pkg. active dry yeast (2 1/4 tsp)
3/4 tsp. ground cardamom
3/4 cup milk
3/4 cup butter
1/4 cup sugar
2 eggs
milk and sugar for topping

Stir together the crushed wheat biscuits, 3/4 cup flour, yeast and cardamom; set aside. Heat milk, butter and sugar in a small saucepan until butter is melted and milk is between 110 and 115 degrees. Add to cereal mixture, stir until combined. Add the eggs and beat for 3 minutes. Stir in enough of the remaining 2 1/4 cups flour to make a stiff dough. (Sometimes you will have to use more then the recipe calls for.) Knead dough for 3 minutes, or until elastic. Put in a greased bowl, cover with a dish towel and let rise until double, about 1 to 1 1/2 hours.
Punch the dough down, divide it into 3 even pieces and let them sit for 10 minutes.
Roll each piece into a 16 inch rope. Connect the 3 ends, make a braid, and connect the other 3 ends. Cover with a dish towel and let rise until double.
Brush the top of the braid with milk and sprinkle with sugar. Bake on a baking sheet lined with parchment paper for 35 minutes at 375 degrees or until golden brown. Enjoy!

Sunday, November 7, 2010

Cheeseburger Soup!!

Okay, so today was our first cheat day on our new diet plan, which by the way, is simply: eat healthier foods in smaller portions.

Anyway, today I made Cheeseburger Soup, from the show Diners, Drive-ins and Dives. Ever since Erich and I saw that episode we've been wanting to try this.

I followed the recipe from the show pretty closely, but I added some touches of my own that made this soup taste much more like an actual cheeseburger rather than a plain ol' hamburger.

I did still try to make this as healthy as possible, although that was pretty difficult. I'll explain the steps in a second, but be warned, you will think you are drinking a cheeseburger when you eat this stuff, it's amazing!

Sarah's version of Grover's 'Cheeseburger Soup'

1 lb. 96% lean ground beef
Salt and pepper to taste
1 medium onion, diced
1/2 Tbs. butter
16 oz. low-sodium chicken broth
1 15 oz. jar cheese whiz
1/2 pint (1 cup) fat-free half and half
1 Tbs. flour
1 Tbs. water
1 large tomato, diced
1/2 head iceberg lettuce, roughly chopped

These are my additions to make it taste more like a cheeseburger:
4 Tbs. dill pickle juice (or you could dice up a couple large dill pickles)
1-2 Tbs. Heinz yellow mustard (more or less to your taste)

Alrighty, first you want to brown your ground beef, season it with salt and pepper and set it aside.
Melt the butter in a large soup pot and saute the onions until translucent. Add the broth, cheese whiz, and half and half to the pot and cook over medium heat until the cheese has all melted. Don't let the mixture boil yet.
Make a slurry out of the Tbs of water and the Tbs of flour and add that to the soup. Bring the soup to a boil and then add the ground beef.
Reduce the heat to medium low and add the tomato, lettuce, pickle juice and mustard. Serve immediately.


My hubby just about went nuts over this recipe. It tasted so much like a cheeseburger without a bun it was almost creepy. I just wish it was healthier, because I'd make it more often then... :(
But you definitely must try this stuff once, because if you like cheeseburgers, this soup will make you very happy.


Side note: I probably won't be updating this blog more that twice a week, though I will try to write as often as possible, but what with the holiday season fast approaching, (made worse by the fact that I work for the USPS) things have gotten kind of busy of late. But don't worry, I'm not disappearing entirely!

Honey Chicken Stir-Fry

This is a short post for I have another post to wrote because I fell behind in getting these up. Yes, I know, shame on me.

This was a delicious recipe I made a couple nights ago, it was super simple, so it's definitely a good recipe for a busy day.

The only thing I changed in this recipe was that I used thin spaghetti instead of angel hair.

Here is the link to the recipe:  
http://www.alithelazydog.com/2009/01/honey-chicken-stir-fry.html
And here's the picture :)

Wednesday, November 3, 2010

Asian Pork Tenderloin Salad


I know it's been a little while since I've posted, things have been quite busy at the start of this month, what with celebrating Erich's birthday and all. But now life is getting back to normal...hopefully.
This month we decided that we are going to eat more healthy, balanced meals. Erich would like to lose some weight and I would like to stay right where I'm at, so we are shooting for about 1500 calories a day for him and about 1200 a day for me. We also decided that we will have four 'cheat' days a month, where we will be allowed to eat some more indulgent foods. So we shall see how it goes.

So now for the food. I got this recipe out of one of my Taste of Home cookbooks, Simple & Delicious. I changed the recipe a bit, but not hugely. I also found a basic recipe for an Asian style dressing. Which I also changed.
The salad recipe called for 2 pkgs of 'Asian Crunch Salad Mix'. I couldn't find any of that, so I just substituted a bag of baby spinach and a bag of mixed greens. I also added some bean sprouts for some extra crunch.
The dressing was good, but if I ever make it again, I will use much less olive oil and more honey. I also used 1 tsp of ground ginger instead of fresh ginger.

Making the salad is super easy, you just slice the pork tenderloin and marinade it for 1 hour. Cook it and then toss it with the greens and apricot slices. It's that easy.


Asian Pork Tenderloin Salad

1 can (15 oz.) apricot halves
1/4 cup soy sauce
1 Tbs. brown sugar
1 Tbs. canola oil
1/2 tsp ground ginger
1/2 tsp minced garlic
1/4 tsp. ground mustard
1 pork tenderloin (1 pound), thinly sliced
2 packages Asian crunch salad mix (I used spinach, mixed greens and bean sprouts)

Drain apricots, reserving 1/2 cup of juice; set apricots aside. In a large resealable plastic bag, combine the soy sauce, brown sugar, oil, ginger, garlic, mustard and reserved juice; add pork. Seal bag and turn to coat. Refrigerate for at least 1 hour.
Drain and discard marinade. In a large skillet or wok, stir-fry pork for 4-5 minutes or until juices run clear. Prepare salad mixes according to package directions; top with apricots and pork.

Asian Dressing

1 garlic clove, minced
1 Tbs. minced fresh ginger
1/4 cup olive oil
2 Tbs + 2 tsp rice vinegar
1/4 cup soy sauce
1 Tbs. + 1.5 tsp honey
2 Tbs water

Combine all ingredients and whisk.

Saturday, October 30, 2010

Let Them Eat Cake

Alrighty, so it's my wonderful hubby's birthday on Monday! Because of how our schedules are we decided to have make the cake today and eat it tomorrow.
Now, it's always been my family's tradition for the birthday boy/girl to pick a 'design', if you will, for their cake. My brothers and I were always quite creative in coming up with cake ideas. Anything from a pipe organ, to a beehive, to a portrait of Abe Lincoln. And it appears that my husband is no less creative!
This year he told me he wanted a hill with a battered, old-looking gray tower, like something out of a fantasy novel.
When he told me that I thought to myself, "Okay, so why am I carrying on this tradition?!"
A battered castle tower on a hill. Hrmm.
I'm not going to go into the details of what all went into this cake. That would take a long time. But I will sum up:
I used 2 9x13 cakes and 3 mini round cakes. The 9x13's were devil's food cake and the tower is white cake.
I used a lot of fondant and a whole mess of butter-cream frosting. And by a whole mess I mean about 5 cups of it.
I made a HUGE mess, what with mixing color into the fondant, rolling the fondant on a powdered-sugar sprinkled counter, mixing up edible paints with clear vanilla and food coloring, and lots and lots of cake pieces and crumbs from carving the cake.
I spent a total of 8 hours on this cake. And yes, my whole entire body is aching right now.
But DH was really, really happy with the outcome, so I think that it was all worth it in the end. I think the whole thing looks like a mess, but hubby keeps assuring me that it's pretty much exactly what he wanted. So I give you a battered tower on a hill cake.


Also, DH thinks it's awesome that I messed up a little and accidentally made the tower look like a skull.
By the power of Grayskull!!

Thursday, October 28, 2010

The American South??

Well, ever since discovering that the grocery stores in this city in which I reside does not carry some of the more specialty ingredients which were required for some of my ethnic recipes, I find myself short several days for this ethnic month. What to do! What I always do, fudge my way through. With grace and brilliance, of course.
So, after a kind of busy day running errands, I needed something to make for dinner. Some quick and preferably easy. Something kind of ethnic...and by kind of, not really ethnic at all. Actually, 'regional' would be a better word. And the only thing that makes this recipe regional in any way is that my recipe came from the kitchen of a friend of my mothers'. This wonderful lady is from the South, is a great cook, and has one of those Southern twangs we all secretly wish we could pretend to have without looking ridiculous. (Yes, sometimes I like listening to Southern accents, it's relaxing. Not the redneck, inbred southern accent, mind you, but the homey, smooth southern accent.)

Anyway, back to the food. Sausage Balls. For you with your minds in the gutter (like me) Sausage Spheres.
Every since the first time I ate these concoctions I have loved them. I love cheese, and this recipe definitely fulfills that hunger. And this recipe is quick and easy. But, if you make it like you're supposed to, (mixing it by hand), it can get kind of messy. But that's part of the therapy of cooking for me, being able to make a mess and know that it is for a good cause.

So, this recipe has 4 ingredients:
(water not pictured) :p


Dump all the ingredients in a large mixing bowl and delight in the absurd amount of cheese you see before you.

                                                             Glorious cheese...ahhhh.

Now, mix the heck out of it with your hands. No cheating, use your hands!
In a random rabbit trail: I've recently been wrestling with the decision of whether or not to buy a kitchen aid. My mother confirmed to me that someday when I have three children like she did, I would NEED one. I replied by assuring her that I would never, ever have three children. And do I really need one? No, for I have come to the conclusion that there is nothing it can make that I cannot make with my hands and some elbow grease. And mixing things by hand adds a wonderful new dimension to the practice of cooking. Something almost, (dare I say it?) spiritual. I think that in a lot of recipes' cases, that mixing things by hand, or with a good ol' wooden spoon adds a subtle delicious flavor to food. And it definitely adds a lot of love (not that I'm saying your cooking didn't have any love, mom) and love always makes food better.
And besides, with the $200+ a kitchen aid costs, I could buy many other things for my kitchen. Or a month's worth of food...gotta sort out the priorities!

Sorry....I forgot to warn you that I can go off on random rants from time to time.
Back the the Ba....Spheres ;)
After mixing up the ingredients this is what the 'dough' should look like (you may have to use more water than is called for, but just mix in the extra a little at a time). Also, why you should take off any rings you might be happening to be wearing before mixing..


Now, break off pieces of the dough (about a heaping tablespoon) and roll into a ball shape. Place these on a cookie sheet. Bake them for 10-12 minutes in a 350 degree oven.
Now, abandon all reason and tear into these delicious morsels like a barbaric caveman, i.e., like my husband did, hahaha.


To the sweet Southern lady who first supplied my mother with this recipe: my tastebuds are forever in your debt.

Now here is the recipe as I have it written down:

3 cups bisquik biscuit mix
1 lb. ground sausage
1 pound shredded cheddar cheese
1/4 cup water.

Mix. Bake. 350. 10-12.

Now, for the translated version

Same ingredients

Place all the ingredients in a large mixing bowl, and stir/knead with hands until it forms a sticky dough. You may need to use more water than is called for. Tear off pieces (about a heaping tablespoonful worth) and form into balls. Place on a cookie and sheet and bake in a preheated 350 degree oven for 10 to 12 minutes. Do not let them get very brown, for then they will be crunchy and not as delicious.

Monday, October 25, 2010

Greece - Spanakopita

I've never really eaten much Greek food. I don't really know much about it. So when it came to finding a good recipe for Greek night I was ever so slightly clueless. But I found a couple good looking recipes for Spanakopita. I remembered my mom making this a couple times when I was younger, and I didn't remember hating it, so I decided to give it a try.
This recipe was kind of a mess to make, and again, I didn't follow the recipe exactly. Hmm, and as I'm reading over the recipe again, I'm realizing I changed it more than I thought. Turns out I forgot two ingredients and a cooking step. Haha, whoops. Still turned out delicious.
So I started with a bag of fresh spinach instead of frozen. I'm pretty sure it made no difference. I sauteed some onion and garlic in olive oil, then added the chopped spinach and cooked it till it was pretty well wilted. Apparently, I was supposed to add some dill and flour at this point and cook it until all the moisture was gone. You can see how well I pay attention to the instructions when I actually start cooking....
Instead of doing that I dumped in the eggs and feta and stirred it up. It was a little runny, and now I understand why. Wasn't a big hindrance, though, I was able to squeeze most of the moisture out as I used it.
So the instructions said to lay out one sheet of phyllo dough and spray it with oil. I don't have a oil spray bottle. So I just brushed it with oil and called it good.
The recipe also said to cut the sheet into three equal lengths the long way. I'm not sure what brand of phyllo dough the original author of this recipe was using, but if I had cut my sheet into 3 strips, I would have had about 3 inch wide ribbons to work with. So I just cut the sheets in half lengthwise.
And after spooning (and squeezing a lot of liquid out of) the mixture onto the corner of one strip, and folding it in half repeatedly to make a triangular shape, I decided to double the phyllo. It helped keep the excess liquid from soaking through the dough and it made for a crispier finished product. And crispier is usually better in my book. Well, at least when it comes to phyllo it is.
Then I put all the little triangles onto a wax paper lined baking sheet (the recipe said to use parchment paper, but I didn't have any, so I used what I had and it worked fine).
Then into the oven at 350 degrees for about 30 minutes. After that 30 minutes was up, I didn't think my spanakopita triangles were quite golden brown enough so I turned on the broiler full blast and let them sit under it for about 1 minute. If you do that, be sure to watch them very, very closely, for they could easily and quickly go from yummy and golden brown to gross and burnt.
These were very yummy, but I think they would serve better as an appetizer rather than a main course. You can also make spanakopita in a more casserole form, but I thought the triangle thing was cool, so I did that. Maybe the casserole style would be more filling as a main course, but hey, trying out stuff is how we learn things, right?


Spanakopita

1 onion, chopped
2 cloves garlic, minced
1 pkg frozen chopped spinach (thawed overnight in fridge) (I used fresh spinach)
1 tsp. dried dill
1 Tbs. flour
4 oz. feta
2 eggs
1 pkg. phyllo dough
melted butter

Saute onions in some olive oil over medium heat till soft. Add garlic, saute 30 seconds. Add spinach, dill and flour, cook 7-10 minutes or until most of the moisture is gone. Remove from the heat and add eggs and feta.
Take one sheet phyllo dough and spray with oil, and place another sheet on top. Cut in half lengthwise. Put a spoonful of spinach mixture and fold up one corner and bring it over to the side. Flip up so it forms a triangle. Continue folding until end of length is reach. Brush the top with butter. Bake on a parchment paper-lined (or wax paper) baking sheet. Bake at 350 degrees for 30-45 minutes. If not brown enough, turn on broiler for about 1 minutes to crisp up the phyllo. Watch closely so they don't burn.

Sunday, October 24, 2010

Not For the Faint of Heart

WARNING: If you are afraid of calories or don't like butter, leave now. Just stop reading and go eat some celery or something.

Alright, for you brave ones who kept reading I would like to share with you the first thing I created with the fresh pumpkin puree I made this morning. But first, I'll show you how I made that puree.

Start with pumpkin, peel removed and chopped into fairly evenly sized cubes. I didn't use a pie pumpkin, so I had to chop it all up first, but a smaller pumpkin you could just cut in half and roast with the skin on, similar to how you roast a butternut squash:


Spread the cubes of pumpkin onto a greased baking sheet:


Put it in the oven at 350 degrees add let it cook anywhere from 45 minutes to 1 hour. Just make sure the pumpkin is nice and tender. Once it's done, it should be a beautiful orange/yellow color, and it should no longer resemble cantaloupe like it does in the above picture.


Let that cool for just a little while, and then in batches, dump into a food processor and blend it until it's smooth. Voila, pumpkin puree.


My pumpkin yielded about 5 cups of puree. Yes, that's a lot of pumpkin and no, I don't know what I'm going to do with all of it!

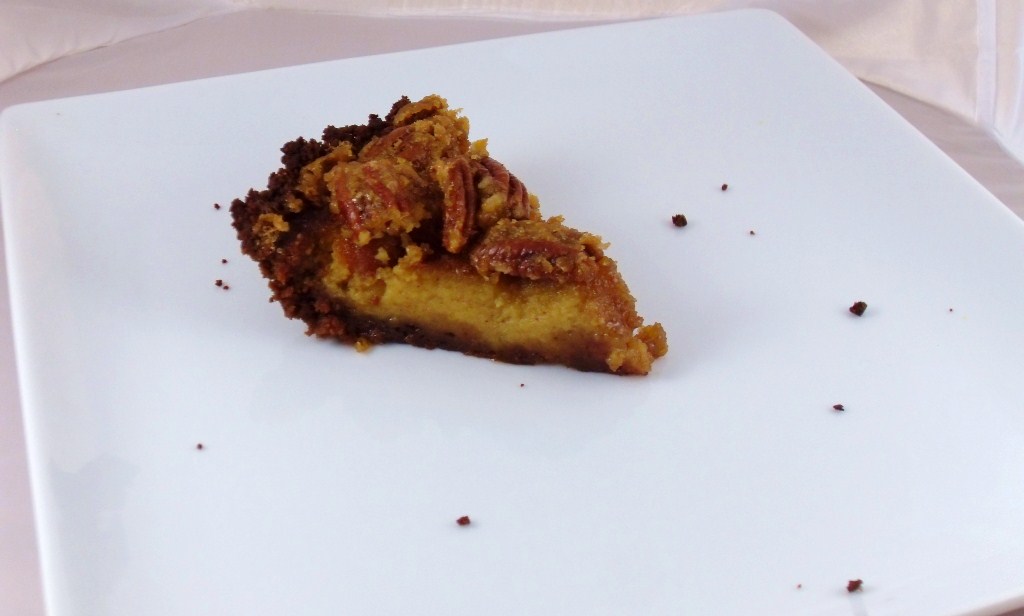
But what I came up with today was good for starters. I'm calling it my Pumpkin Pecan Pie Hybrid. I decided to mix a pumpkin pie with a pecan pie and see what happened. I was extremely excited to make up my own recipe instead of stealing somebody else's.
I didn't want to make a regular old pie crust either, so I tried to think of something fall-y, that went well with pumpkin and could be made into pie crust. Gingersnaps. It was (hopefully) perfect. Gingersnap crumb crust. Yum.
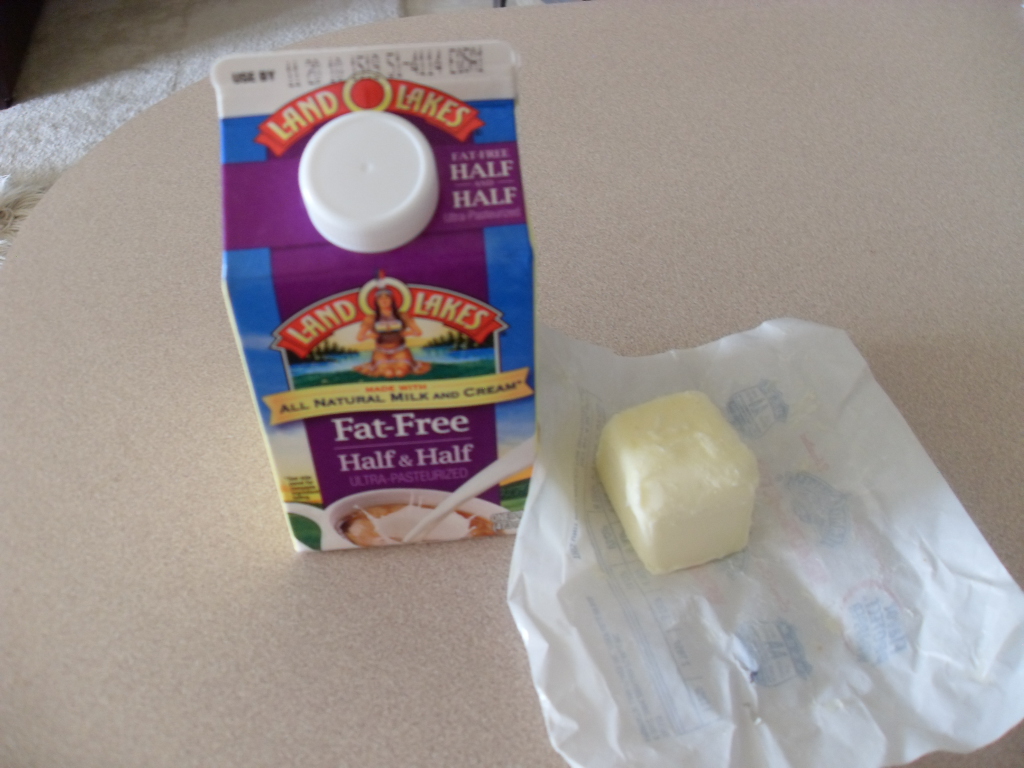
So I started by melting 3 1/2 Tbsp of butter and mixing it with about 2 cups of gingersnaps and about 1/4 cup white sugar. I'm saying about before all these measurements, because, truth be told, I didn't measure hardly anything in this recipe, so I'm guessing the amounts and hoping they are accurate.
So, anyway, mix up the butter, sugar and crumbs and press the mixture onto the bottom and up the sides of a 9-in deep-dish pie plate. It's very important you use a deep-dish pie plate, otherwise you might end up with a mess oven to clean. Bake the crust at 400 degrees for 10 minutes. While that's baking whip up the filling.
I combined my two fillings in two separate bowls before combining them. I have no idea whether that made any difference in the end or not. We'll say it did.
So in the first bowl I mixed 1 cup light karo syrup, 3 eggs, some vanilla and 2 Tbsp of melted butter. There's the pecan pie half. (Yes, I know there aren't any pecans in play yet, I'll get to that, be patient!)
In the second bowl I combined about 1 1/4 cups of my fresh pumpkin puree, 1 egg, about 2 Tbsp. each brown and white sugar, three dashes of pumpkin pie spice (about 2 tsp), and about 1/4 cup milk.
Then I dumped the two mixtures in together and whisked the crap out of it. Pour the filling into the warm gingersnap crust, reduce the oven heat to 350 degrees and bake it for 45 minutes.
Now for those pecans. I used pecan halves this time, but chopped pecans would work just as well. I decided to try to praline the pecans to give them a nice caramel-y sugar coating, so I melted 4 tbsp of butter and 1/2 cup brown sugar in a skillet over medium-high heat. After it melted completely and I mix the sugar and butter together I tossed in 1 cup of pecans. Then I stirred it until the sugar mixture started to look all bubbly and angry, then I poured it all out onto a couple sheets of tinfoil. Just let it sit for a while till it cools down.
After the pie has baked for 45 minutes, take it out of the oven and dump the pecans all over the top (be sure to get all that extra sugar-butter on there!). Then, put it back in the oven and bake it for 15-25 minutes longer.
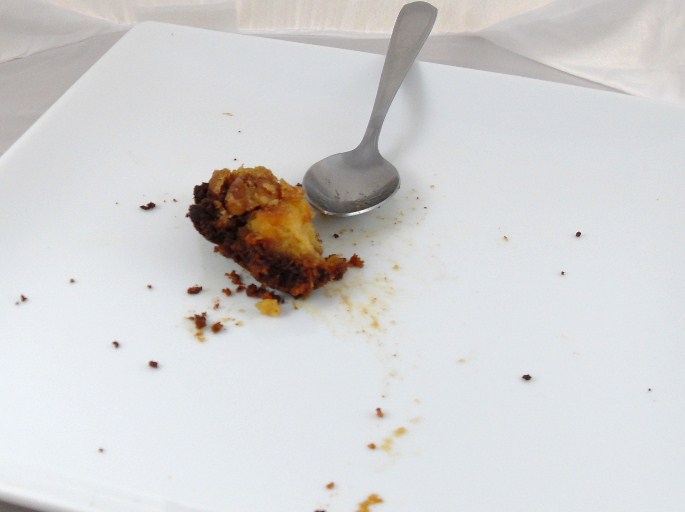
Let the pie cool on a baking rack for about 20 minutes, and then carefully eat 3 pieces. Go slow though, so your teeth don't immediately fall out... (I'm just kidding, DH and I could only manage one piece each, this stuff is just plain sinful.)


Let me tell you, fresh pumpkin puree really makes a big flavor difference. I can't wait to try a plain pumpkin pie with this stuff. It's hard to describe but even DH noticed the change. He said he probably would never want a pumpkin pie from canned pumpkin ever again. That could be a bad thing....I guess there is going to be a lot of pumpkin puree making in my future.

Pumpkin Pecan Pie

Crust:
2 cups crushed gingersnaps
3 1/2 Tbsp. melted butter
2 Tbsp. sugar

Mix together well and press mixture onto the bottoms and up the sides of a 9-in deep-dish pie plate. Bake at 400 degrees for 10 minutes.

Filling:

(pumpkin pie)
1 1/4 cups fresh pumpkin puree
2 Tbsp. white sugar
2 Tbsp. brown sugar
2 tsp. pumpkin pie spice
2-3 Tbsp. milk
1 egg

Mix.

(pecan)

1 cup light Karo syrup
3 eggs, lightly beaten
1 tsp vanilla
2 Tbsp. melted butter

Mix.

Mix together the two different fillings and pour into the warm pie crust. Bake at 350 degrees for 45 minutes.

Pecans:
4 Tbsp. butter
1/2 cup brown sugar
1 cup pecans (halved or chopped)

Melt butter and sugar in a skillet over medium high heat. Add in pecans and stir until mixture starts to bubble. Pour onto a sheet of foil and let cool.

After pie has baked 45 minutes, pour pecans and praline mixture over top and return to oven. Bake for 15-25 minutes longer. Cool on a baking rack for at least 20 minutes. Store in refrigerator.

Saturday, October 23, 2010

Mini Blog II!

So the hubby and I carved our jack o' lanterns today. It was the first time I've ever carved a pumpkin for Halloween. I have to say it was a lot of fun, but speaking as someone with a lot of back/neck problems, it's also quite a chore!
And of course, what do you get besides an awesome Jack-o'lantern when you carve pumpkins?? Pumpkin seeds!! I've never roasted pumpkin seeds before, but I figured it couldn't be too terribly hard to figure out.
So after getting off all that stringy, nasty, slimy gunk off the seeds, rinsing them and drying them a little on a towel:


I tossed all of them in a little olive oil. Now, I prefer sweet and the hubby prefers savory, so I divided the seeds in half, and mixed in salt and pepper to one batch, and some sugar, ground cloves and cinnamon to the other half.
Then I spread them onto a baking sheet and put them in the oven at 300 degrees for about 45 minutes.


They taste pretty damn good, so even if I did something wrong, they turned out yummy and Erich is devouring his quite rapidly, so overall a great success!


And here's the pumpkins we carved! Erich's:

Mine:


And I'm probably going to have another mini blog tomorrow, when I figure out what to do with the massive amounts of pumpkin that I cut up from a third, smaller pumpkin that we bought. Two gallon bags full of raw pumpkin....should be an adventure.

Friday, October 22, 2010

Country XIII: Sweden


After searching the web for Swedish recipes, I have come to the conclusion that most people think that Swedes survive on a diet that consists solely of Swedish meatballs. Finally, after looking at probably 30 different meatball recipes, I found a recipe for a Swedish hash, or Pytt i Panna. Which made me happy, because I hate making meatballs. I changed the recipe I found a bit, but not a whole lot.

Besides a lot of dicing, this recipe is super easy. I cut the carrots into coins instead of dicing them, because I'm just wild and crazy like that. Then you dice up some onion, beef, parsnip and potatoes (I used 5 small red potatoes). The recipe said to cook the meat and the veggies separately, but I think not having to wash 4 different pans when I'm done eating, so I cooked it all together in one big skillet. Saute the onion  first though, to get in that nice caramelized flavor.

Cook all of it for about 10 minutes, then pour in a little beef stock (the recipe called for chicken stock, but I only had beef, and I figured, what goes better with beef than...beef?). I also added just a touch of half and half cream. Just because. Cook that until most of the liquid evaporates and season with salt and pepper. I used white pepper instead of black and it was delicious.

Serve it with some mustard (the recipe said to use Dijon, but all I had was good ol' Heinz yellow, still tasted great), pickled beets and a fried egg. These flavors all worked so great together it was quite amazing. DH and I voted this one a keeper recipe.


Pytt i Panna (Swedish Hash)

3 diced potatoes (I used 5 small red)
1 diced onion
1 diced carrot (I coined instead of diced)
1 diced parsnip
2 Tbsp. butter
3/4 lb beef, diced
2 eggs
1/4 cup chicken stock (I used beef)
Pickled beetroot
A strong mustard (I used Heinz yellow)
Salt and pepper

Cut beef into dices of about 1/2 inch squared.
Gently fry onions in butter until golden.
Fry potatoes, parsnip and carrot about 8 to 10 minutes over medium heat. (I just put the beef in with this and made the whole thing easier). Add a little chicken stock at the end, and let it boil in completely.
In a very hot pan, fry beef quickly until brown, but not well done.
Add the vegetables and onion and fry together for about 1 minute. Season with salt and pepper.
Serve with fried eggs, beetroot and a mustard.

Thursday, October 21, 2010

Country XII - Finland

Sorry it's been a couple of days since I posted. Had date night with DH one night, and then I was sick yesterday, but now we are back on track.
So Finland. I really had very little idea what was traditional in the way of food in Finland. But after doing some research I learned that cabbage rolls and mashed potatoes is one of the traditional dinners there. I was happy to learn this, for I love both cabbage rolls and mashed potatoes.
I was very excited, and pleased with the outcome, but this dinner was rather time and effort involved! But I decided, since it was so delicious, that it was worth it.
Let's start with the mash, since that was easier.
Peel and chop some potatoes, and boil them until they are fork tender.


Mash them roughly with a fork.


Now, the secret to great mashed potatoes is 1) these two ingredients, and 2) not being at all shy with them:

(Don't use fat free half and half if you want a fluffier mash, I just used this to make them slightly more runny, in the European fashion. I normally use regular, fattening half and half.)


Add the cream and butter, and whip with an hand mixer. Again, I used a lot of fat free half and half to make these potatoes the more traditional European way.

Now, on to the cabbage rolls. First, get some white rice cooked and cooled. Then, brown 1 lb. of ground beef. Next, take 1 head of cabbage and cut a deep cone shape in the bottom, removing the core.
Drop that, bottom side down, into a large pot of simmering water, and cook until the leaves are tender. I removed the leaves one at a time with tongs to drain in a colander:
Let those cool a bit and finely chop up some onion. Now, combine the rice, ground beef, onion, heavy cream, white pepper, salt and egg yolks. Warning, this mixture will be quite runny, so prepare to have a very messy counter-top. So, roll up about 1/3 cup of the mixture into each cabbage leaf, placing seam side down into a very well buttered baking dish (I used a 9x13). 
Now, my mom always topped her cabbage rolls with tomato sauce, but I read that the traditional Finnish way of preparing these was to mix equal parts melted butter and molasses and brush the tops with that mixture. So I mixed 3 Tbsp. butter and 3 Tbsp. molasses (next time I think I will use more than that) and brush the tops of the rolls with 1/2 of the mixture. 
Bake those at 350 degrees for 20 minutes. Then, turn the rolls over and brush with the remaining molasses mixture. Reduce the oven temperature to 300 degrees and bake for 90 minutes longer. 
Serve with those delicious mashed potatoes. One thing to make this dinner preparation easier to just make the potatoes ahead of time, and just reheat them in the microwave before serving. Enjoy!


Stuffed Cabbage Rolls
1 lb. ground beef, browned
1 cup cream
2 egg yolks
1 med. onion, finely chopped
1/3 cup cooked short grain rice (I used about 2/3 cup to help soak up some of the cream)
1 tsp salt
1/4 tsp white pepper
1 large head white cabbage
Butter
Molasses
Cut a deep cone-shaped incision in the bottom of the cabbage and remove the core. Place whole cabbage, bottom side down, in a large saucepan, at least half submerged in simmering water. Cook until leaves start to soften. Remove gently with tongs and drain.
Mix together beef, rice, onion, egg, cream and spices. The mixture will be runny. Stuff leaves, rolling tightly. Place cabbage rolls seam side down in a wide, generously butter oven pan. Mix equal amounts melted butter and molasses and brush rolls with 1/2 of the mixture. Bake at 350 degrees for 20 minutes. Flip rolls over and brush with remaining molasses mixture, reduce heat to 300 degrees and bake for 1.5 hours. Turn rolls every 30 minutes if desired. Cover with foil if the rolls are browning too quickly. 

Mashed Potatoes
I'm afraid I have no recipe for these. The amounts of everything you use depends on how many people you are serving. Today I used 6 medium potatoes, about 5-ish Tbsp of butter and about...uh...maybe 1 cup of half and half. (Remember I was making the potatoes runnier than usual). The amount I made today would serve about 3-4 people.

Sunday, October 17, 2010

Country XI: Italy (Homemade Pasta!!)

Italy. When most people think of Italian food, they usually think of copious amounts of red sauce, cheese, alfredo, and pasta. I love all of that stuff, but I wanted to stay away from the heavier Italian dishes this time, and I also really wanted to try making homemade pasta. So, I was looking at Italian pasta dishes, and I was finding a lot of the same; red sauce and cheese. Until I finally stumbled upon a blog entry about Corzetti pasta. And I honestly cannot remember whose blog this was, and I forgot to bookmark it, otherwise I would share a link.
Anyway, it was all about there are special corzetti pasta cutters, that have handcarved designs on them that imprint onto the pasta, blah, blah. But they are hard to come by and will cost you an arm and a leg. So I decided that I could do pretty much same thing with a small round cookie cutter. My corzetti just wouldn't have any pretty pictures on them.
So the blog included an easy recipe for the pasta and a simple dressing of pine nuts and herbs. Nice and light, and no red sauce!
Now, I was a little worried about making my own pasta, because again, I've heard a ton about how it's so difficult and hard to do. But I forged on ahead because I seem to like cooking things that could turn out to be massive disasters.
So, all that you need to make this particular recipe is flour, egg yolks and white wine.


Take the flour and just dump it straight onto your (hopefully clean) counter-top. Use your fingers to make a little well in the center.


Put the egg yolks into the well.


Beat them gently with a fork and add in the wine, (and please make sure you own a corkscrew before you get started, unlike me. I had to leave the yolks and flour just sitting on my counter while I ran and bought a corkscrew) and muddle those together a bit.


Carefully incorporate the flour into the mixture in the well, and yes, this will be very, very messy. I suggest you wear an apron. A big one.
So mix it together until it forms a dough, adding flour until it's no longer sticky. Don't make too dry though, because then you would have to start all over.


Wrap the dough tightly in floured plastic wrap and let it sit for 20 minutes.  While it's sitting you can clean up the huge mess of flour that is now taking over your counter-tops. Also you can set up whatever pasta machine you are using. I have this one that my mom has owned for years and she was kind enough to let me borrow.


Yeah, it's pretty awesome. Now unwrap the dough and cut it in half. Set the pasta machine on the widest setting, and run the pasta through, folding it over thrice before each time through the runners. Flour as needed to keep the dough from sticking. Gradually set the rollers thinner, until you get the pasta to the desired thickness. (I went to setting 5 on my machine). This is what you should end up with:


Now I just used a small, round cookie cutter to cut the pasta. I ran the remaining back through the settings on the machine and re-cut it, but I couldn't do it more than twice, because the dough starts to get too tough.
Have a pot of salted, boiling water ready for when you're done cutting the pasta shapes.


These little darlings only have to cook for 2-3 minutes. Drain them in a colander (I ran just a little cold water over them to stop the cooking process). Now you can get the pine nut dressing ready!


Heat the olive oil in a small skillet and saute the minced garlic for one minute. Toss in the fresh, chopped parsley and pine nuts and cook that until the pine nuts reach a nice brown color.
Put your freshly cooked pasta in a serving dish, top with the pine nut mixture and top that with as much grated Parmesan cheese as you would like.
This stuff was sooo good, not heavy at all, and homemade pasta is massively different from the boxed variety. It's very tender and not as gummy as store bought. I think I may become addicted to making my own pasta. And to think I was afraid at the beginning! I think everybody should at least try making their own once in their life. It's too good not to!


Corzetti with Parmesan, Pine Nuts and Herbs

Dough:
1 cup all purpose flour
4 egg yolks
1/4 cup white wine
Sauce:
1/3 cup olive oil
2 cloves garlic, minced
1/8 cup pine nuts
Handful of chopped parsley
Salt and pepper to taste
Grated Parmesan

Dough:
Place flour on workspace and make a well in the center. Place egg yolks in well and beat lightly with a fork. Add wine to egg and mix. Slowly incorporate the flour with the fork until a dough forms. Knead and add flour till dough is no longer sticky. Wrap in floured plastic and let rest for 20 minutes. Cut in half and take each piece and run it through pasta rollers on the widest setting Fold in thirds and run it through rollers several more times. Adjust roller to next thinnest setting and pass pasta through (flour constantly to avoid sticking). Pass through till you get the thickness you want, usually #4 or #5 for corzetti. Lay pasta sheets on floured surface and cut out small round shapes. Place pasta shapes in boiling, salted water for 2 minutes. Drain and dress with sauce.
Sauce:
Heat oil in a small skillet and saute garlic 1 minute. Add pine nuts and herbs. Season with salt and pepper. Cook until pine nuts are nicely toasted. Pour over pasta and sprinkle with Parmesan.